Using the drag-and-drop manipulator

Use the drag-and-drop manipulator to enable users to drag and drop nodes in your Kanzi application. See Enabling the drag-and-drop gesture for a node.

Use the Drag and Drop Manipulator triggers to react to the drag-and-drop gesture. For example, you can set the appearance of a node when the user drags and drops that node. See Using the Drag and Drop Manipulator triggers.

The drag-and-drop manipulator is one of the input manipulators you can use to add gesture recognition to nodes in your Kanzi application. You can assign the input manipulators through the Kanzi Engine API. See Using input manipulators.

Enabling the drag-and-drop gesture for a node

To enable the drag-and-drop gesture for a node:

  1. In Kanzi Studio create a project using the Application template.
  2. In the Project create a node for which you want to enable the drag-and-drop gesture.
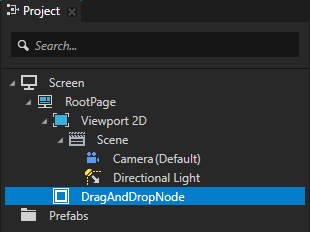
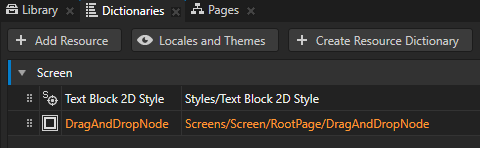
    For example, create an Empty Node 2D node and name it DragAndDropNode.
  3. In the Project select the node you created in the previous step, in the Properties add the Hit Testable property, and set it to enabled.
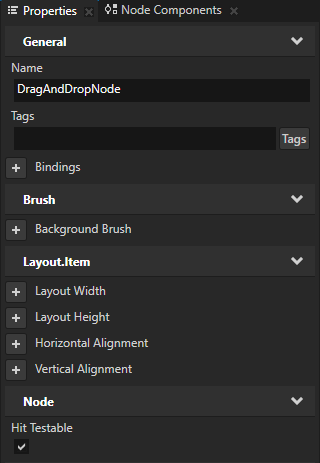
    When you enable this property you enable the user to pick a node.
  4. In the Project press Alt and right-click the node you created and select Alias.
    Kanzi Studio creates an alias pointing to the node from which you created the alias and adds it to the resource dictionary of its nearest ancestor node that contains a resource dictionary.
    Access alias target nodes using the # sign followed by the name of the alias.
  5. Select File > Export > Export KZB.
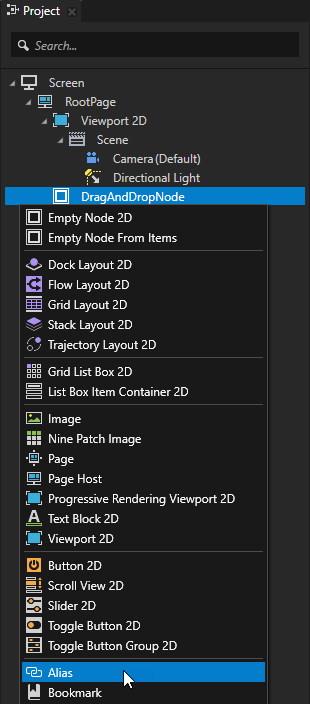
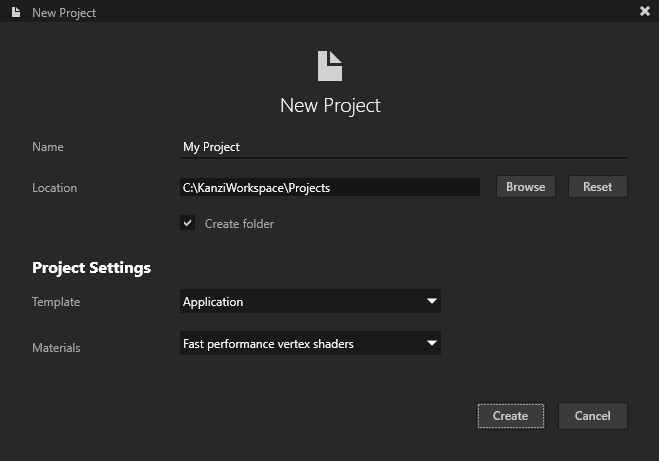
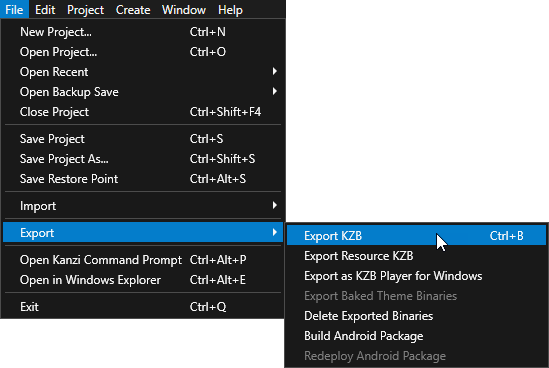
    Kanzi Studio creates the kzb file and configuration files from your Kanzi Studio project. Kanzi Studio stores the exported files in <KanziWorkspace>/Projects/<ProjectName>/Application/bin or the location you specify in the Binary Export Directory property in Project > Properties. The kzb file contains all nodes and resources from your Kanzi Studio project, except the resources you mark in a localization table as locale packs.
    When you run your Kanzi application from Visual Studio, your Visual Studio solution reads these files to create your Kanzi application.
  6. In Visual Studio open the solution stored in <ProjectName>/Application/configs/platforms/win32 and in the file which implements the logic of your application create and configure the drag-and-drop manipulator:
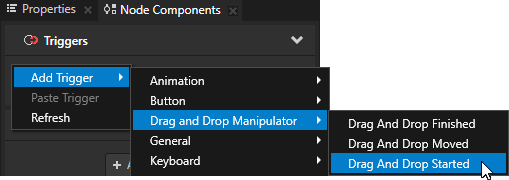
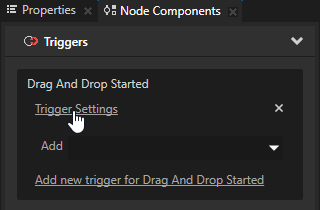
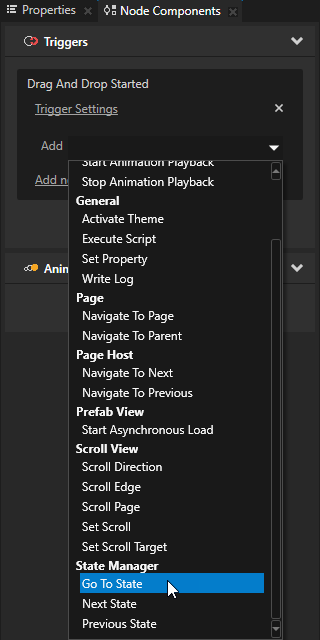
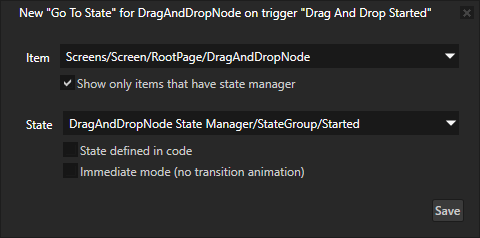
    1. Create the handlers for the drag-and-drop messages.
      For example, after the public section of the class which implements the logic of your application add:
      private:
      
          // Handler for the DragAndDropManipulator::StartedMessage message from 2D nodes
          // that have an input manipulator which generates drag-and-drop messages.
          // This prepares the 2D node for dragging.
          void onDragStarted(DragAndDropManipulator::StartedMessageArguments& messageArguments)
          {
              // Get from the message arguments the node that the user drags.
              Node2DSharedPtr dragAndDropNode = dynamic_pointer_cast<Node2D>(messageArguments.getSource());
      
              if (!dragAndDropNode)
              {
                  return;
              }
      
              // Save the point from which the user started dragging the node,
              // relative to the origin (by default the top left corner) of the node.
              m_dragGrabOffset = messageArguments.getPoint();
      
              // When starting a drag-and-drop gesture on the node, bring the node to front.
              dragAndDropNode->moveToFront();
          }
      
          // Handler for the DragAndDropManipulator::MovedMessage message from 2D nodes
          // that have an input manipulator which generates drag-and-drop messages.
          // This translates (moves) the node by the distance the user drags it.
          void onDragMoved(DragAndDropManipulator::MovedMessageArguments& messageArguments)
          {
              // Get from the message arguments the node that the user drags.
              Node2DSharedPtr dragAndDropNode = dynamic_pointer_cast<Node2D>(messageArguments.getSource());
      
              if (!dragAndDropNode)
              {
                  return;
              }
      
              // Move the node by traveled distance given by getPoint, relative to the origin of the node.
              // To keep dragging from the same point on the node, subtract the grab offset.
              SRTValue2D transform = dragAndDropNode->getLayoutTransformation();
              transform.translate(messageArguments.getPoint() - m_dragGrabOffset);
              dragAndDropNode->setLayoutTransformation(transform);
          }
      
          // Offset from the top left corner of the DragAndDropNode where the user pressed down or clicked on it.
          Vector2 m_dragGrabOffset;
    2. In the onProjectLoaded() function create a DragAndDropManipulator and subscribe to its messages.
      For example, add:
          virtual void onProjectLoaded() KZ_OVERRIDE
          {
              ScreenSharedPtr screen = getScreen();
              Domain* domain = getDomain();
      
              // Get the DragAndDropNode using its alias.
              NodeSharedPtr dragAndDropNode = screen->lookupNode<Node>("#DragAndDropNode");
      
              // Create an input manipulator that generates drag-and-drop messages.
              DragAndDropManipulatorSharedPtr nodeDragAndDropManipulator = DragAndDropManipulator::create(domain);
      
              // Add the input manipulator to the DragAndDropNode.
              dragAndDropNode->addInputManipulator(nodeDragAndDropManipulator);
      
              // Set the duration of the long press before the drag-and-drop starts to 200 ms. The default is 500 ms.
              // This is the amount of time the user has to press the node before they can start dragging it.
              nodeDragAndDropManipulator->setPressDuration(chrono::milliseconds(200));
      
              // Subscribe to the DragAndDropManipulator::StartedMessage message at the DragAndDropNode node.
              // The DragAndDropManipulator generates this message when the user has pressed the node
              // for the duration set by DragAndDropManipulator::setPressDuration.
              dragAndDropNode->addMessageHandler(DragAndDropManipulator::StartedMessage, bind(&MyProject::onDragStarted, this, placeholders::_1));
      
              // Subscribe to the DragAndDropManipulator::MovedMessage message at the DragAndDropNode node.
              // The DragAndDropManipulator generates this message when the finger or mouse moves.
              dragAndDropNode->addMessageHandler(DragAndDropManipulator::MovedMessage, bind(&MyProject::onDragMoved, this, placeholders::_1));
          }
  7. Build and run your application. See Deploying Kanzi applications.
    In the application long-press and drag the node for which you enabled the drag-and-drop gesture.

Using the Drag and Drop Manipulator triggers

Use the Drag and Drop Manipulator triggers to react to the drag-and-drop gesture. For example, you can set the appearance of a node when the user drags and drops that node.

The Drag and Drop Manipulator has these triggers:

To use the Drag and Drop Manipulator triggers:

  1. Enable the drag-and-drop gesture for a node. See Enabling the drag-and-drop gesture for a node.
  2. Define the behavior that you want to set with the Drag and Drop Manipulator triggers.
    For example, create a state manager where you define the states which set the appearance of a node when the Drag and Drop Started, Drag and Drop Moved, and Drag and Drop Finished triggers are set off. See Adding a state manager to your project.
  3. Add and configure a Drag and Drop Manipulator trigger:
    1. In the Project select the node to which you want to add the trigger, and in the Node Components > Triggers section add one of the Drag and Drop Manipulator triggers.
      For example, in the Project select the node for which you enabled the drag-and-drop gesture and in the Node Components add the Drag and Drop Started trigger.
    2. In the trigger you created in the previous step click Trigger Settings and in the Trigger Settings Editor disable the Set Message Handled property.
      When you disable the Set Message Handled property, this trigger intercepts the message, but does not stop it. This way you let the input manipulator handle the message.
    3. In the trigger you created, in the Add dropdown menu select an action and configure it.
      For example, select the Go to State action, and in the action settings set:
      • Item to the node for which you enabled the drag-and-drop gesture
      • State to the state which sets the appearance of the node when the Drag and Drop Started trigger is set off
  4. Repeat the previous step to add and configure more Drag and Drop Manipulator triggers.
    For example, add the Drag and Drop Moved and Drag and Drop Finished triggers. In the Go to State action of each trigger set State to the state which sets the appearance of the node when that trigger is set off.
  5. Select File > Export > Export KZB.
  6. Build and run your application. See Deploying Kanzi applications.
    In the application long-press and drag the node for which you enabled the drag-and-drop gesture.

Using the drag-and-drop manipulator in the API

For details, see the DragAndDropManipulator class in the API reference.

See also

Using input manipulators

Deploying Kanzi applications

Using triggers